Showing posts with label Create a Critter. Show all posts

Monday, October 8, 2012

Letter of the day is O


I used Create a Critter to make my card today.  Since the letter of the day is O I chose an Octopus to represent the letter.


I put her on the card base with an action wobble, because I am in love with these things


Isn't she the cutest ever? I love how this turned out.  
I welded 2 sandcastles together in CCR to make the card base.


Thanks for stopping by, 
Please let me know what you think of my project, I love to read your comments.

Wednesday, October 3, 2012

Create a Critter page 25


For today's challenge at My Cricut Craft room we were to use either of the images from page 25 of the original Create a Critter.  It's actually the second page of the images.  

If you know anything about me, you know I love owls, so I of course chose the sweet little owl.
 If you've never made a shaped card, here's what I started with.  I laid out my 3 shadow images and the main layer in Cricut Craft room, got them all the right size then welded 2 at the side of the head to form the base of the card.
Then cut the rest of the layers using the main shadow image to get the correct size.
 Here she is all cute and sweet with her little twine bows and glittered feathers.
 This is what it looks like open, I love that she stands on her own.
And, since we have gone pink for Breast cancer awareness I added a small pink heart to her chest, you can also see her glittered feathers a bit better.

Thanks for stopping by, I'd love to hear what you think of my project.  

Monday, September 24, 2012

Letter of the day is M


Since Christmas is only 3 months away I thought I'd use Merry Christmas for my M project.

I made a fun pull up card using Santa and the chimney from Create a Critter.
The chimney was cut at 4 inches and Santa was cut at 3 inches

 The little red circle says Have a Magical Christmas, so I have 2 M's in my project (grin)
I used white glitter paper for the base and outlined the bricks with one of my copic markers.
Since we have gone pink, the pink on my project is represented in their cheeks with pink gems


Tuesday, September 18, 2012

Bee Stong ladies!


Too many of us are guilty of not checking ourselves and I am one of them.  I had a scare last year with a lump and had to go get my first mammogram and boy, let me tell you it was scary, and when I got the call to go back for another because they weren't sure what they saw and I had to have an ultrasound really got me thinking.  Thankfully mine was just a fibroid cyst but it really makes you stop and think.
So please!!, check yourself and get those mammograms when you are supposed to.
Hugs and prayers of health to you all!

For this card I used the Create a Critter cartridge and the Artiste Cartridge
I made yet another easel card, are you sick of seeing me do these yet?  I sure hope not  because they are so much cuter!

Here's a side view, I used foam squares to pop up the piece with the word strong on it to act as a stop for the easel.

The bee is mounted on an action wobble, I trimmed the plastic sticky part down to fit on her head, added some glitter to her wings and some google eyes 

Doesn't she have the cutest little face?

Please leave me some love, I enjoy reading your comments.

Thursday, September 6, 2012

Fall Foliage challenge

My Cricut Craft Room Design Team


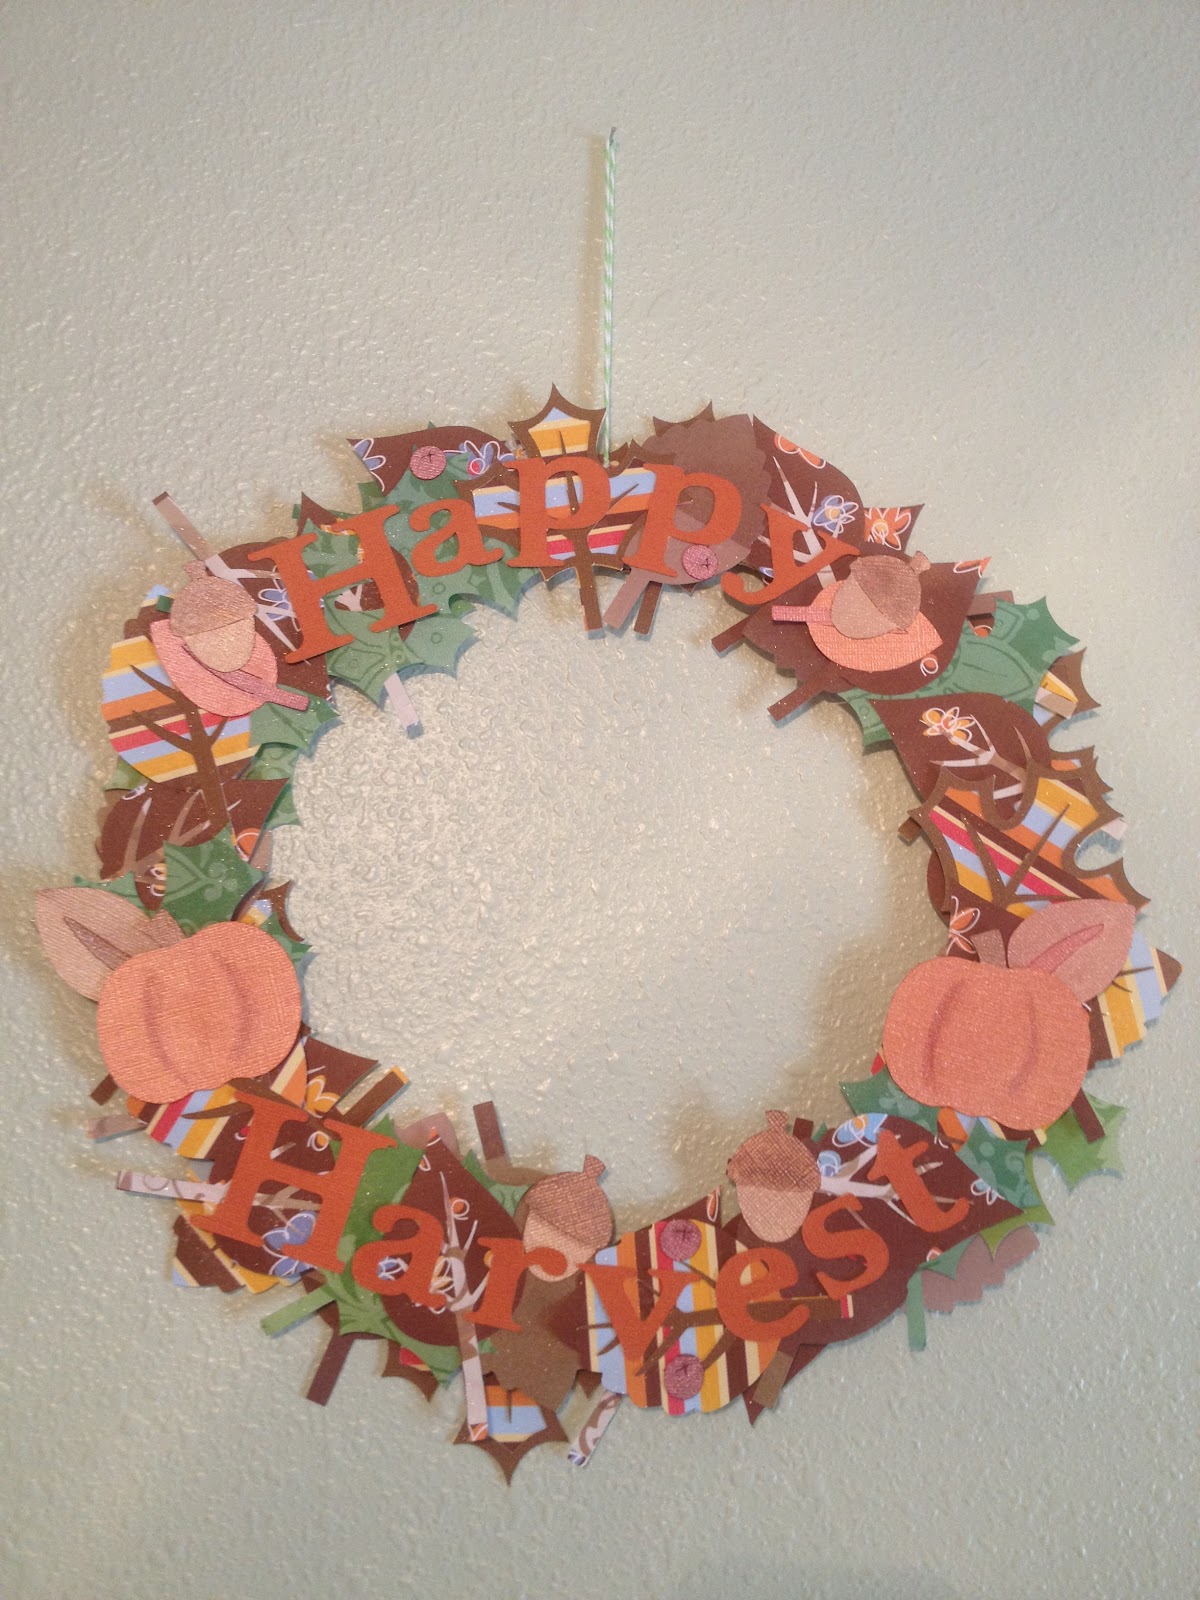
Ready for cooler crisp weather? I know I am, so this project theme was perfect! Also I made myself do something I'm not great at, a home decor item.

I used Art Philosophy, Create a Critter and Doodle Charms to create this project today.
 A close up of some of the leaves, I used my fall DCWV stack from last year
 Here is my wreath.  I just 3 chipboard circles using the Art Philosophy then 2 paper circles and glued them all together with the paper on the front and back.  Then glued leaves randomly on the top then turned it over and glued more on the back facing forward to add a bit of dimension.  I started to use foam dots to really make it pop but changed my mind when I thought about storing it for next year.  I think it will hold up better being more flat.
 The letters are from Art Philosophy along with the leaves.  The pumpkins are cut from Create a Critter and the acorns, berries an small leaves are from Doodle Charms.  The later, I cut on white pearl paper then colored with my Copics.  The entire wreath is sprayed with Shimmer spritz so there's a tiny hint of sparkle to the whole thing.
I love how it turned out and will proudly display it :)
Thanks for stopping by, I hope you'll head over to Erica's blog to see what the rest of my Design Team sisters have created,  we have a very talented group so you won't be disappointed.

Tuesday, August 21, 2012

Card creating Tuesday, Get well card


Get well cards is today's challenge.  It was perfect timing because my good friend is under the weather so I made this for her.  I sure hope she's got it before she sees this post. ;)


I used my Gypsy for this one and I thought I'd show you how I laid out the mat and give you a screen shot of the Gypsy.  Sometimes it helps to see all the details.
 You can see how I welded the two seals along with the base for him to sit on.  Notice if you will, I made it so the card will open backwards (i.e. from the left)
The point of this card is to make her smile so I went for extra silly.
 Here is the finished product, I had wrote the sentiment and added some liquid pearls paint to the base and some silver glitter glue spread thin all over his body.


Isn't he sweet?
Hugs Stacy, I hope you are feeling much better today!!
Please head over to Erica's blog to see what the rest of the design team has come up with.  You won't want to miss anything, they are all spectacular!

Thursday, March 29, 2012

Create a Critter cartridge


YEAH!!! today is my favorite cartridge!!! CREATE A CRITTER! 
I love this cartridge so much, there are so many cute things you can make with it.  I just love the little faces on all the characters. 
I chose to make a page around some paper I got from Erica's shop, it's gorgeous and made for a very easy scrapbook page.
I cut the cupcake out at about 3 inches and added some glitter glue.


Wednesday, February 15, 2012

Scrapbook page continued

Today's project is a continuation of pages for my scrapbook page from Monday's project for Imagination So if you missed it, scroll down and check it out, I'd love to hear what you think.
So, this is the back of that same page, I've started a new thing trying to make my scrapbooks thinner, by flipping over the paper when possible and creating the next page right there.  
I used the Best Friends cartridge again for the pattern of the words. Splash and Just Chillin.  They came from the Create a Critter phrase keys. Splash is with the octopus on page 41 and Just Chillin is with the penguin on page 39.  Recognize the frame around the page? Yup, it's the negative from the piece I used on the front of the paper. ;) smart huh?
 Here is what the page looks like, that is my sister and her daughter in the water, just enjoying and and trying to find good shells. The Family Fun title I welded on my gypsy using the Cricut font cartridge and cut from the real red paper and the frames for my sister and niece are also red.  The cloud is the same as the one from the other side of the paper and filled with the Best Friends pattern.
I added stitching around the main edge of the 12 by 12 and inside the cutout.
The bottom pictures are of my mom and adorable daughter having at blast with her first trip to the beach and then sitting with her Uncle trying not to fall asleep.
The adorable starfish are again filled from the Best Friends cartridge.  I find that when I get a new Imagine cartridge it lives in my machine until I get a new one. Unless I find a particular project requires it go back in it's box. Sorry for that tangent, The starfish are cut form the accessory feature from page 41.

Monday, February 13, 2012

Imagination Monday

Today I decided to pull out a few pics that need to be on a scrapbook page and design around them instead of just making up a page.  
This is from last summer during our family vacation.  My sister and her family come here one year and the next we go up there so this was our vacation here and we went over to the west coast to my Aunt's house and had a fabulous time at the beach.  
 I used Elegant Edges for the large pink background piece, this is one of the main reasons I wanted this cartridge, I love these big pieces but hate to pay the price for them in the stores.  Now I can make my own, among other things...
I used red paper (real red from SU, my fav red paper) then layered the picture of my daughter with dark purple to match her bathing suit.  There is black stitching around the red frames and the pink background piece and white stitching around the purple frame.
 The adorable sun is from Create a Critter, I used the Best Friends Imagine cartridge to fill the pattern on the pieces.  I splayed out the layers so the edges all show.  I used a scrap piece of pink paper I had on my desk to put behind the cheeks and mouth.  There are foam squares between each layer on the sun. The picture above shows you the dimension.  
The title is also from Create a Critter and filled with the Best Friends Imagine cartridge.
I added little twine bows to the title. The cloud is a base image from the Imagine and filled with pattern from the Best Friends Imagine cartridge.
Thank you for looking

Monday, January 16, 2012

The Letter "C"


Today's challenge is the letter C, we could do a number of things, such as, use a cartridge that began with the letter C, use a letter C on our project, use an image that began with a letter C or use a function key on the cartridge that begain with a C.  I used the Cricut cartridges, Cindy Loo and Create a Critter.  I've had this note book hanging around naked for sometime now, so it finally decided to get dressed.  

The background paper is by Bobunny, super awesome company by the way. I measured the book, cut the paper then laid the cover on the paper and marked where the square holes were. I then used the marks as guides for my paper punch from Stampin' Up made for this very purpose. It worked perfectly!! I was super thrilled too! After getting the holes punched I applied the paper to the cover using mat decoupage medium.

Everything is cut from cream card stock, I printed everything on the imagine using the Imagine More cartridge.  I really, really love my Imagine,  this closeup shows the one flaw with printing and using decoupage medium over them.  The colors run.  I had to be extra careful and wash my brush quite often to keep from contaminating the whole project but I managed to still get some color in areas I didn't want it.  
I used a foam dot to pop up my little lady bird's wing and had to add the google eyes.  I think I like them a little too much.  I probably have hundreds of them just waiting to be glued to something cute!
I'm not sure the background paper really goes with the love birds, but the book is cute anyway...at least I think so.
Thanks so much for looking, please leave me a comment, I LOVE reading them!

Tuesday, December 13, 2011

25 days of Christmas Penguins scrapbook layout


I used some awsome purple glitter paper to make my Penguin's little belly. She's a designer penguin, up on all the latest fashion. ;)
The photo corners are a punch I used little pop dots to adhere the corners only so I can still put pics on the mats. I also adhered ICE with pop dots.  My family is going to Gaylord Palms presentation of ICE tomorrow so I am making a layout to go with just a few of the many pictures I know I will take.

Here is a close up of the adorable and fashionable penguin
Thanks for looking

Friday, December 9, 2011

25 Days of Christmas-Animals challenge


Here is my name plaque for the 25 days of Christmas Challenge that was an animal project using the Imagine.  This is a Christmas present for a little man named Easton. In this pic nothing is glued down and I forgot to take a pic before sending it off. But it was all printed then cut with the Imagine, it's so cool to put a piece of white paper on the mat and put everything on from different cartridges and press one button and this comes out! So amazing. :) I love my Imagine.